Post by Red Dragon Negotiator on Mar 19, 2013 17:33:57 GMT -6
Here I'll put together some tutorials on using the scenario editor in Train Simulator 2013. Rather than write one gigantic tutorial, I'll just make parts. Though this first one will probably be the biggest and include all the basic information on how to get a scenario to work. If you have a question, post it here. I'm sure others can chime in too. Keep in mind I don't know everything there is to know about the editor and my method might not be as good as another, but it works for me and it's a pretty simple editor to use. I will be posting how to's on scenario creation, not route building and editing. At least for now. I haven't really taught myself much about editing or building routes. On to the first tutorial...
=======================================
Tutorial Part I: Creating a basic freight operations scenario
=======================================
In this first tutorial I will go over what you'll need to do to get the most basic scenario up and running. Then from there it'll be easier to explain other things. I'll have pictures to go along with the information. I won't be explaining all of the icons and options you can work with in this tutorial, just the basics. This tutorial will focus on setting up a standard freight operations scenario.
Start by opening TS2013 and from the main menu go to Editor. After clicking Editor you'll see a screen similar to that in Pic1 below. The routes listed on the left are the routes you can choose to make a scenario for, obviously. What you see for routes will all depend on what you have installed for content. I'll do this first tutorial on the Donner Pass route.
Pic1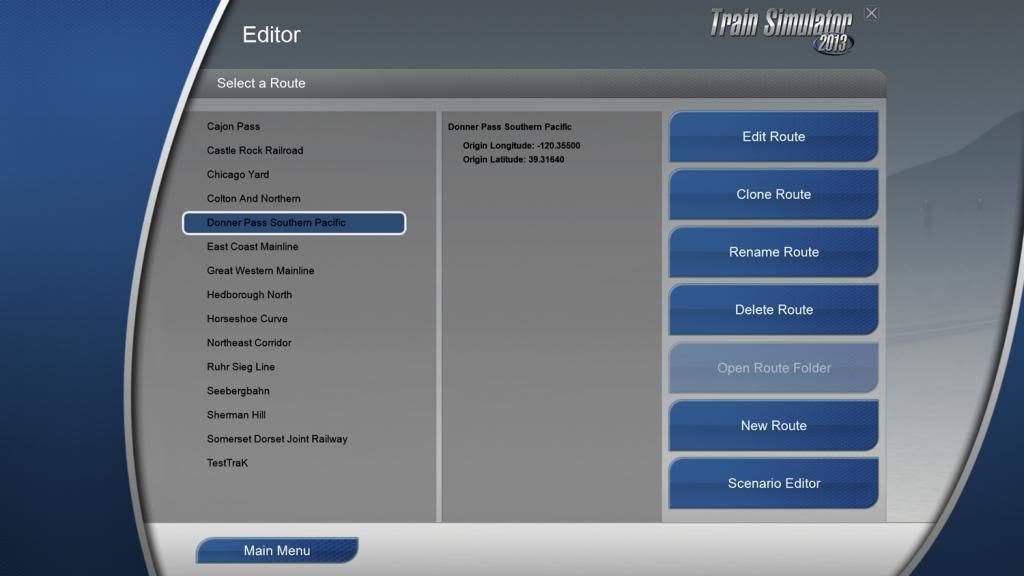
Once you've highlighted a route, you want to click Scenario Editor on the right. Now you get to Pic2. Listed in the center are all the scenarios already made for that route. You can choose to edit them if you want, but I'm starting from scratch so I'll choose New Scenario on the bottom right.
Pic2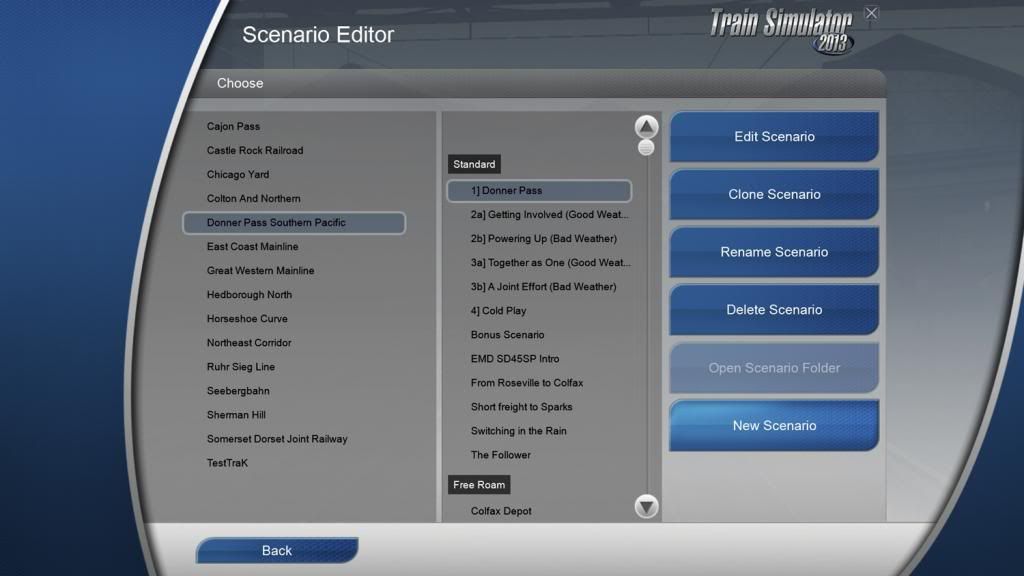
After that you'll see Pic3. On the left are all the available default locations on the route that you can choose to start from in the editor. Now, even if you choose to start at Colfax, you can still place the player train anywhere and start from that location when the scenario is loaded. But you want to choose where the scenario will start, because this is where the camera will default to when loading the scenario in the editor. On the right are some options for the type of scenario. Almost all of the time you'll want to choose Standard. After clicking Create, you'll need to name the scenario. After naming it, the game will load you into the editor.
Pic3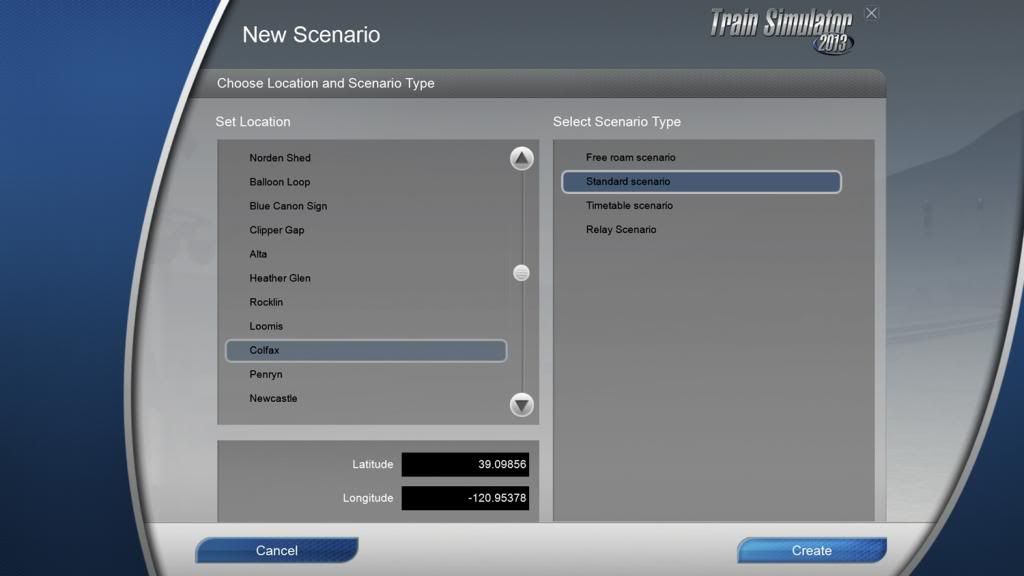
Once loaded, you'll see a screen similar to Pic4. Mouse over the edges of the information/tool boxes around the sides of the screen and they will slide out. Click the tack in the upper right corner to "pin" a boxes you commonly use. I always pin the ones in Pic4 below. The box in the top center of the screen is for navigation. Mainly, you'll want to use it to enter the 2D map. The box in the upper right is the scenario properties and information. This box is here by default when a scenario is first loaded.
-The first line is the scenario's name. This should be pre-loaded since you already entered this information.
-Under that is the scenario description. This will appear when you are viewing the scenario's description from the main menu of the game.
-Under that is the scenario briefing. This is the briefing you get in-game when you check your objectives and briefing.
-The next two lines are unimportant now.
-After those is where you can change the scenario's apparent date.
-Again, the next two lines aren't important at this time.
-In the last line you can change the starting time of the scenario.
-In the final three drop down menu's you can change the weather, season, and the "class" of locomotive (which you should just leave at "All").
The box on the upper left is the main tool box where you have all of your scenario and route editing options. The box on the lower left contains all of the games objects available, including locomotives, rolling stock, mapping objects like trees and house, etc. The bar on the very bottom right of the screen is where you will play the scenario when you're ready to test it. You can also change the speed of the game and if you want the route locked or unlocked. The very first thing you should do immediately when the scenario is loaded for the first time is edit the basic information in the panel on the upper right of the screen. And choose the season and weather. Get that out of the way first.
Pic4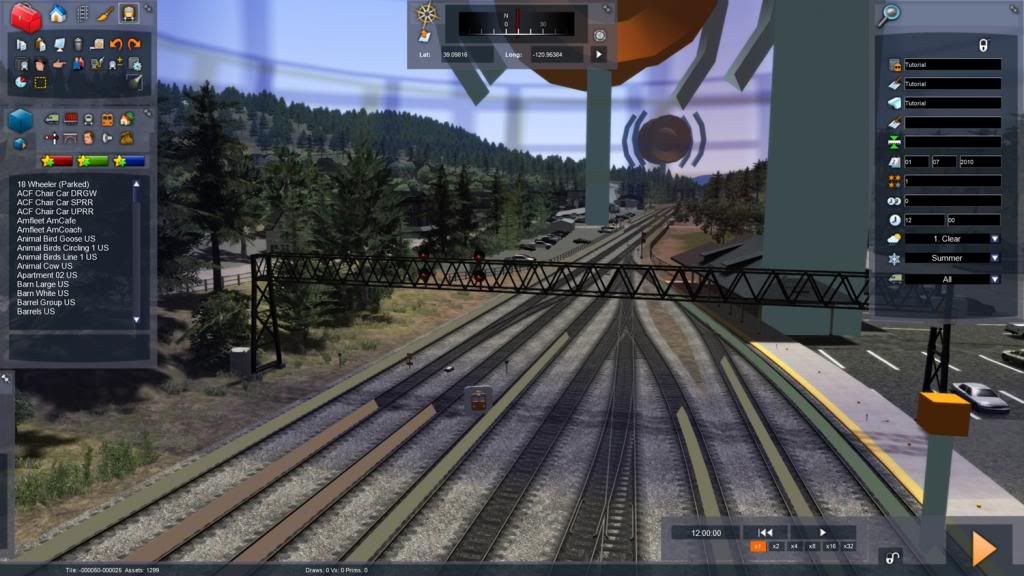
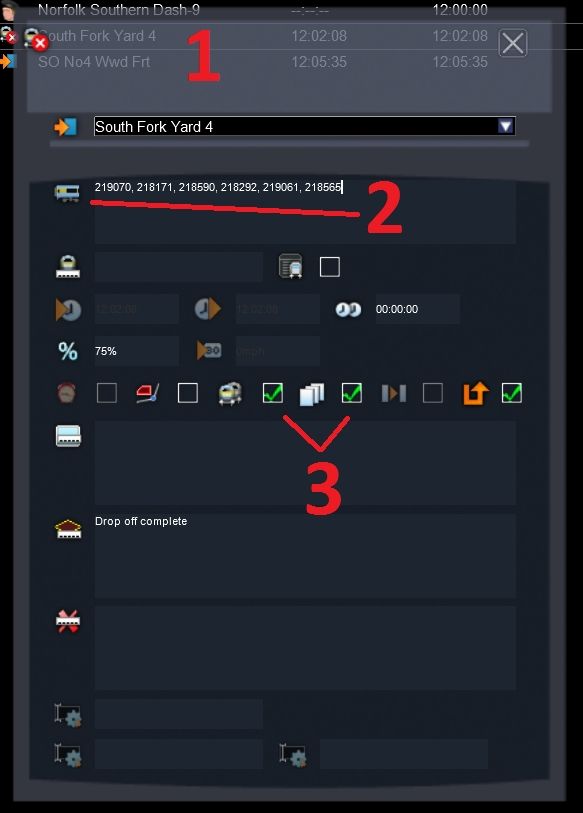
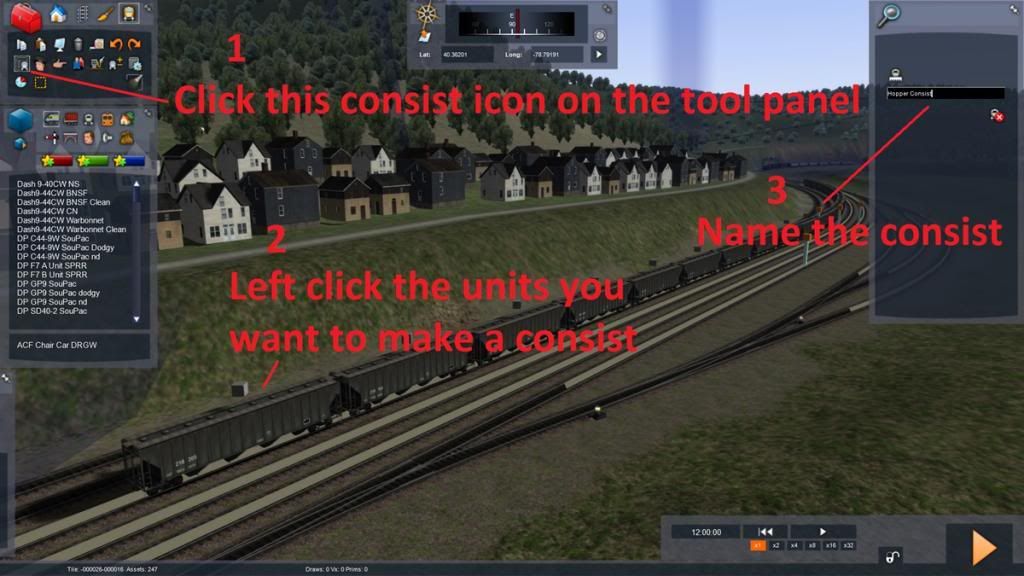
So now that basic explanations of the tool boxes are out of the way and you've given the scenario it's basic information, you'll want to start actually creating the scenario. The first step is to "load" the locomotives and rolling stock into the scenario. Like I did in Pic5 below, click the little box with the orange triangle on the left(1). Then the box on the upper right will change(2). Here you will check off what content you want to be available in this scenario. It is broken up into categories by the developer in the drop down list at the top. I always at least load everything from RSC. Check off the center box for one or all content in the drop down list.
Pic5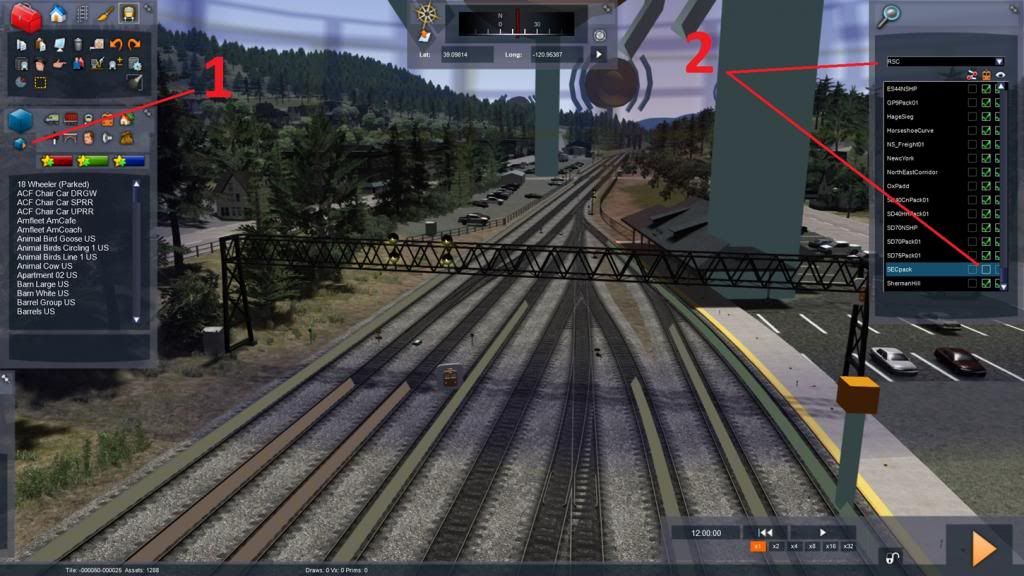
Below is a picture of the main tool bar on the left hand of the screen and what you'll be working with when creating a scenario. Refer to this if you want to see which icon to click.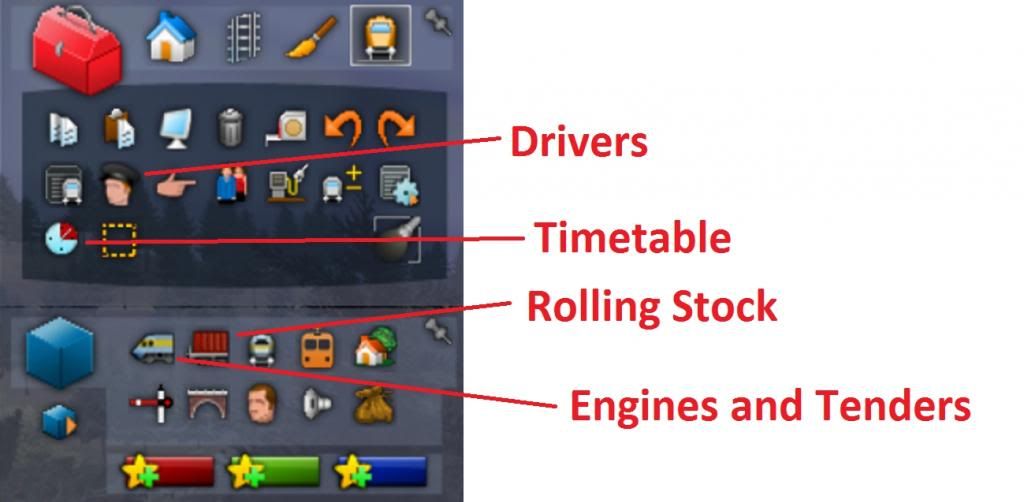
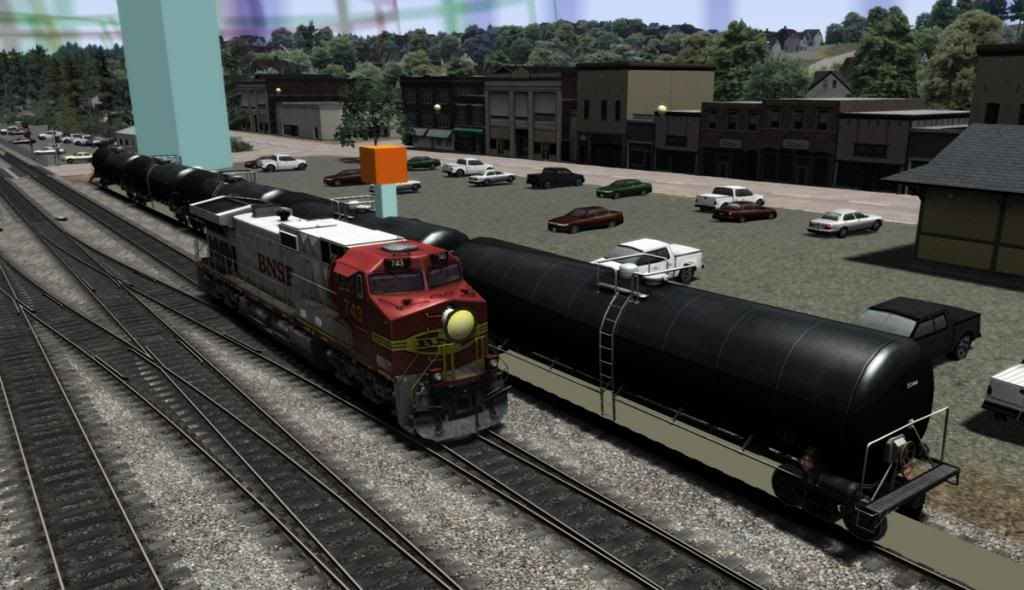
Click "Engines and Tenders" and choose the locomotive you want to use from the list. I'm using the UP ES44AC (Pic6). You'll now have this unit visible in red floating with your mouse pointer. When you place it over a track and left click, it'll be placed on the track. If you left click again, another unit will be placed, attached to the first. When you're happy with the number of locomotives, you can right click the mouse to get rid of placement mode. I have placed two of these units, and then right clicked to get rid of the third(Pic7).
Pic6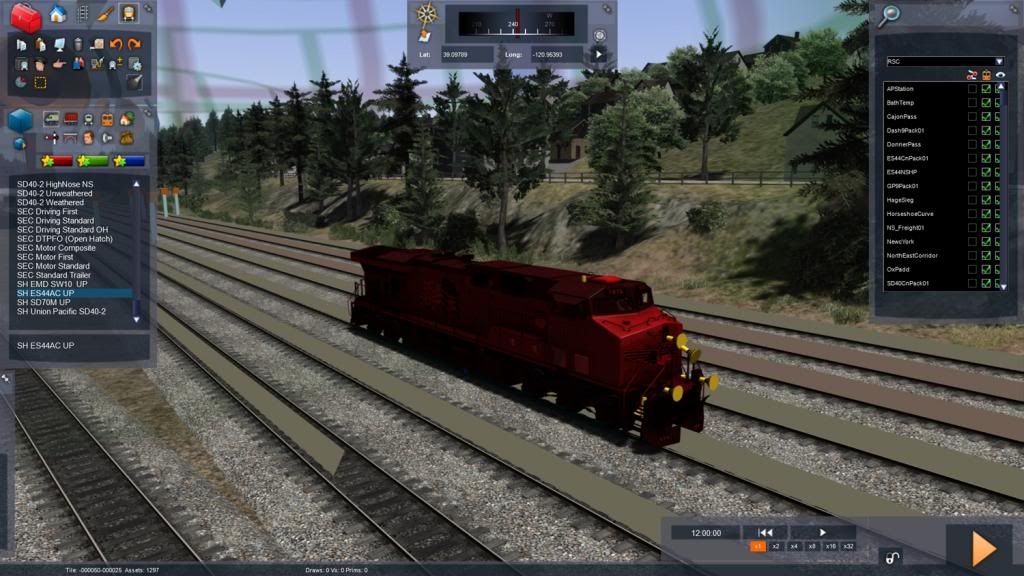
Pic7
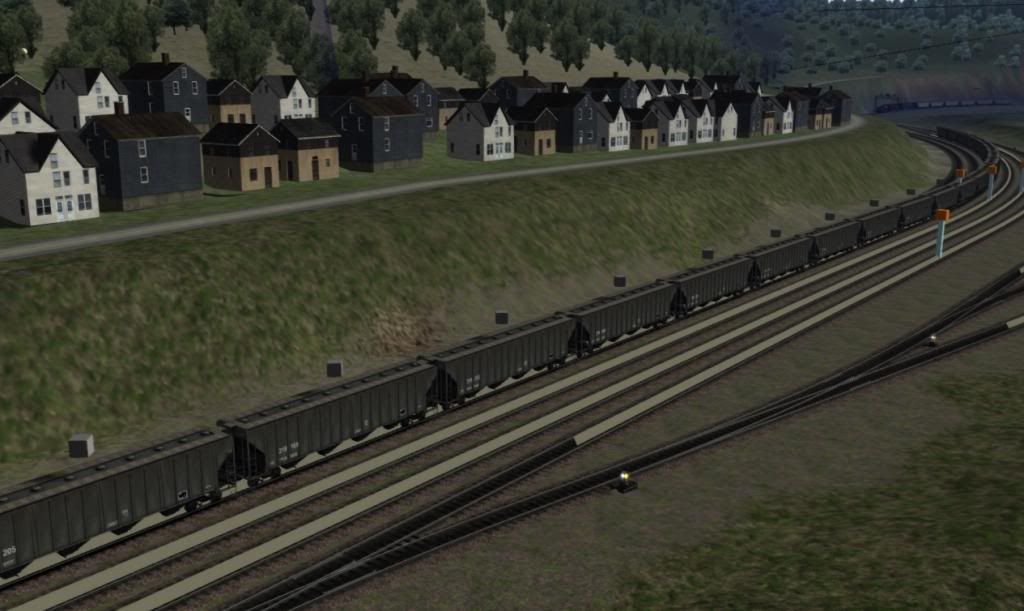
Next I am selecting "Rolling Stock" to give these Evolutions something to pull(Pic8). Just like the locomotive, choose what you want from the list and left click to place it on the track. To attach it to the locomotive, place it directly behind the locomotive. You'll hear a clacking sound when it's properly connected. Play around with placing cars little, it's easy to do. You can quickly build up a train by continually left clicking. To delete any car or locomotive, just left click on it and press Delete on the keyboard.
Pic8
Double clicking any locomotive or piece of rolling stock opens a box with some options on the right side of the screen. If the piece of rolling stock is an open top hopper or contains any load that is visible, you can check the box in Pic9-2 to "load" it.
Pic9-1 (For locomotives)
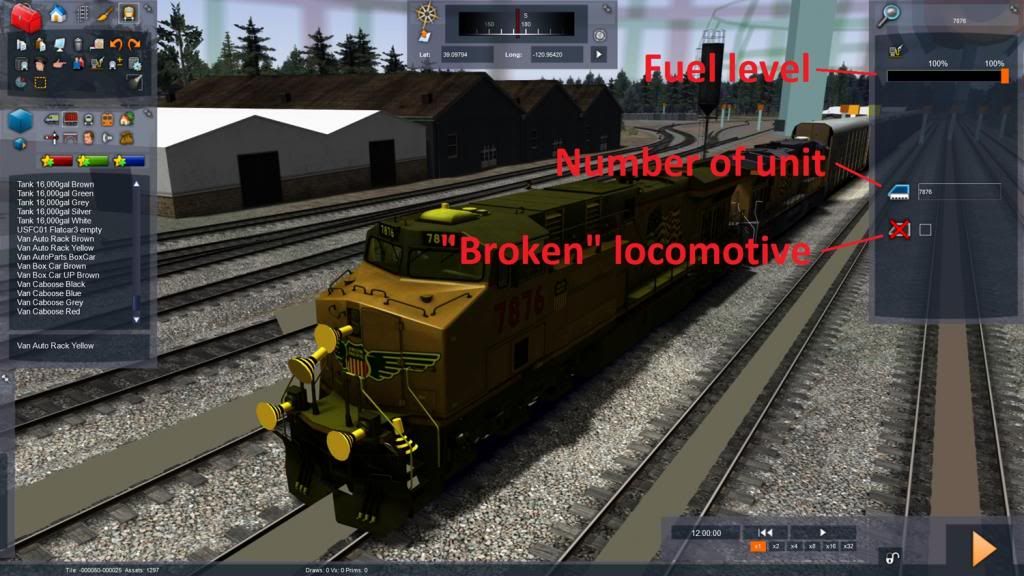
Pic9-2 (Rolling Stock)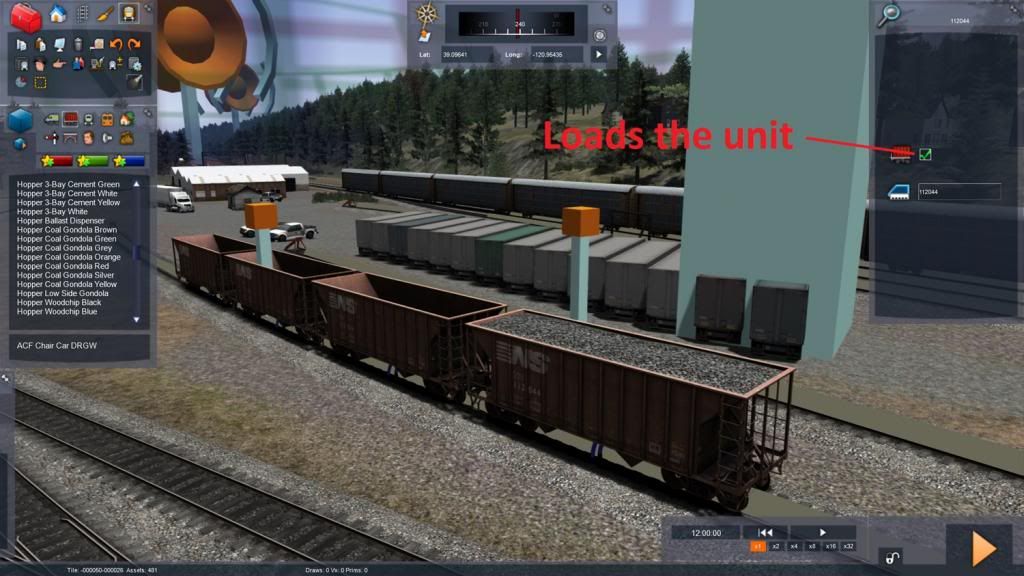
Now you can click the "Driver" icon on the tool panel and then left click on your lead locomotive. This will place an icon above the unit like in Pic10. This now signifies this unit has a driver, though we need to give the game instruction on what to do with this driver.
Pic10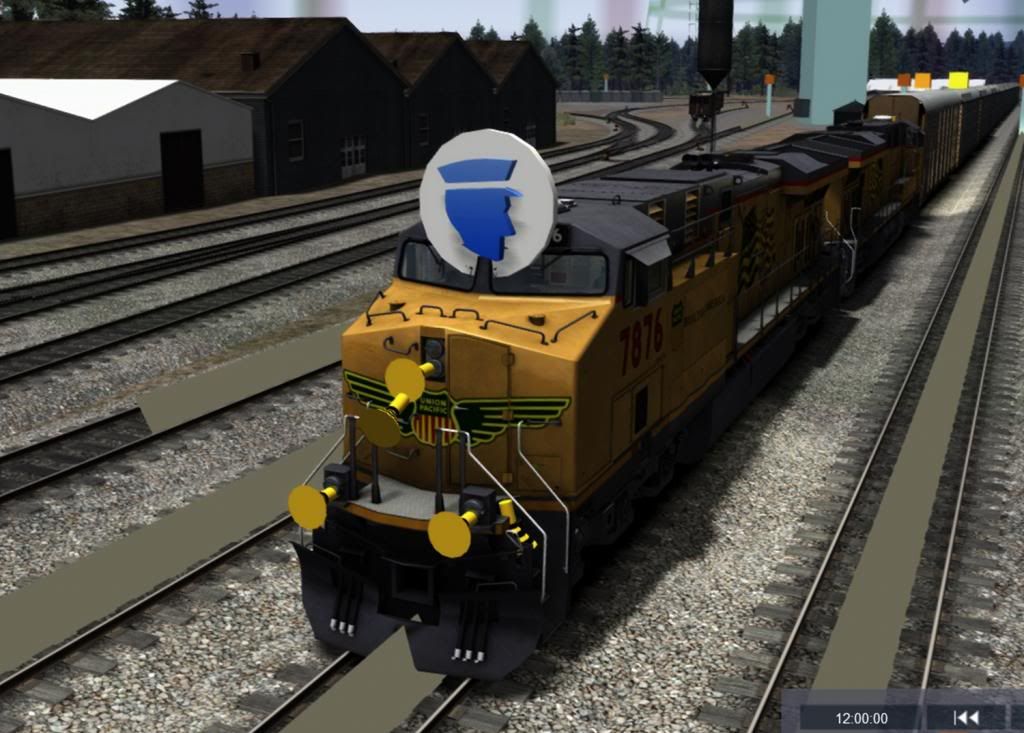
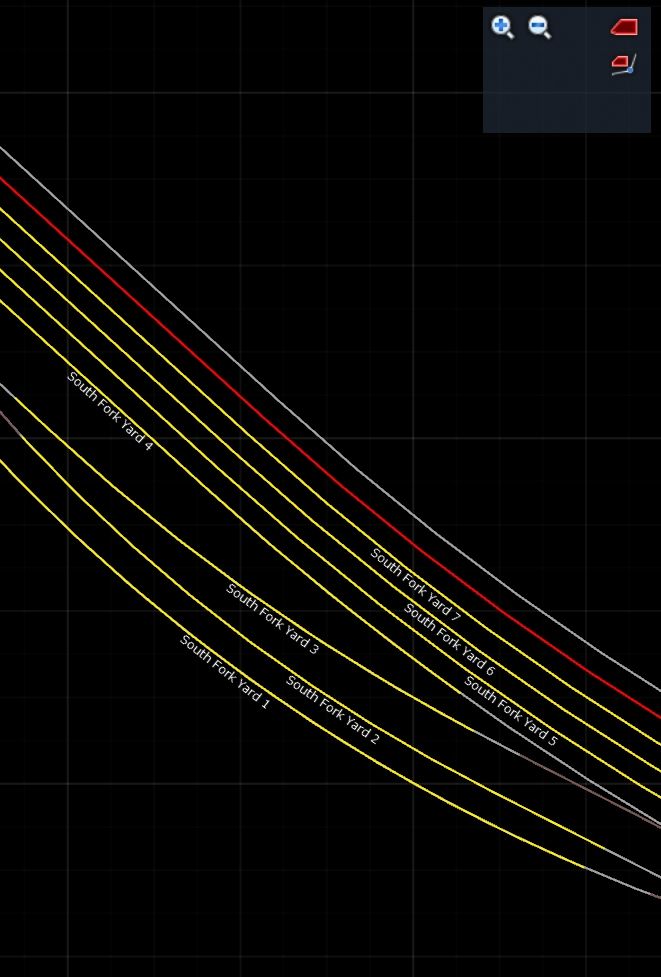
To do this, we need to open the "Timetable". After clicking the icon, you'll open a new screen like the one in Pic11. On the left you will see a 2D view of the route. You can move the view around the route. You can also zoom in and out with the mouse wheel. It's obvious. Above the 2D map is a drop down list of all the "drivers" you have added to the scenario. On the top right is a panel of all of the tools you will use in the Timetable. Under it is the list of "instructions" for the selected train. By default each created driver train is named Service1, Service2, 3, etc. Since we only have one driver, he's already selected, but you'll usually have to choose which driver you want to work with from the drop down list when entering the Timetable. What you'll want to do is give this "driver" or train, a name, a priority and a final destination. These are the three basic things I do with every driver I create. Keep in mind, you HAVE to give each created driver a final destination, or you'll get an error and the scenario won't load. Start by clicking the head with the conductor hat which I've circled in red in the picture below.
Pic11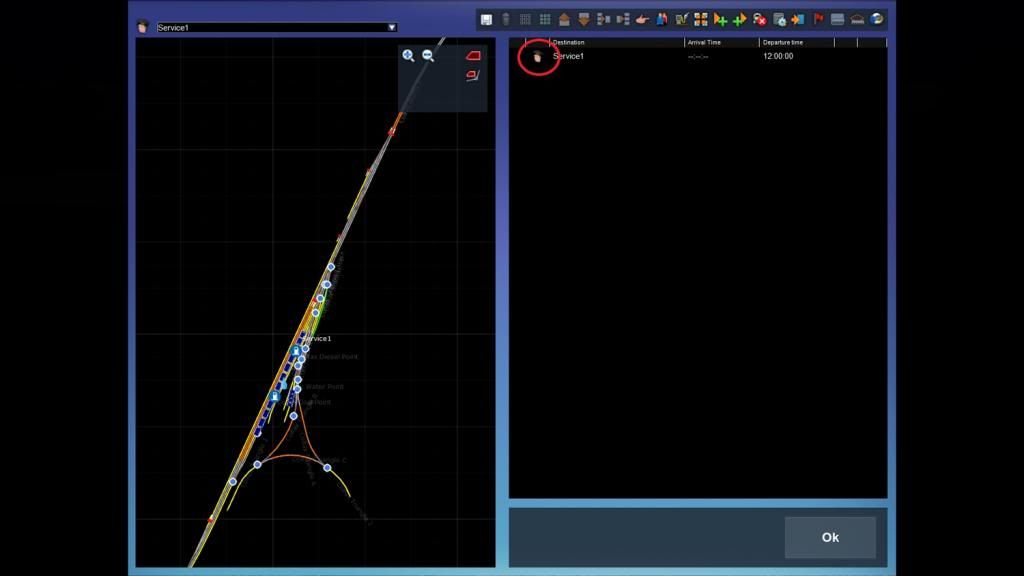
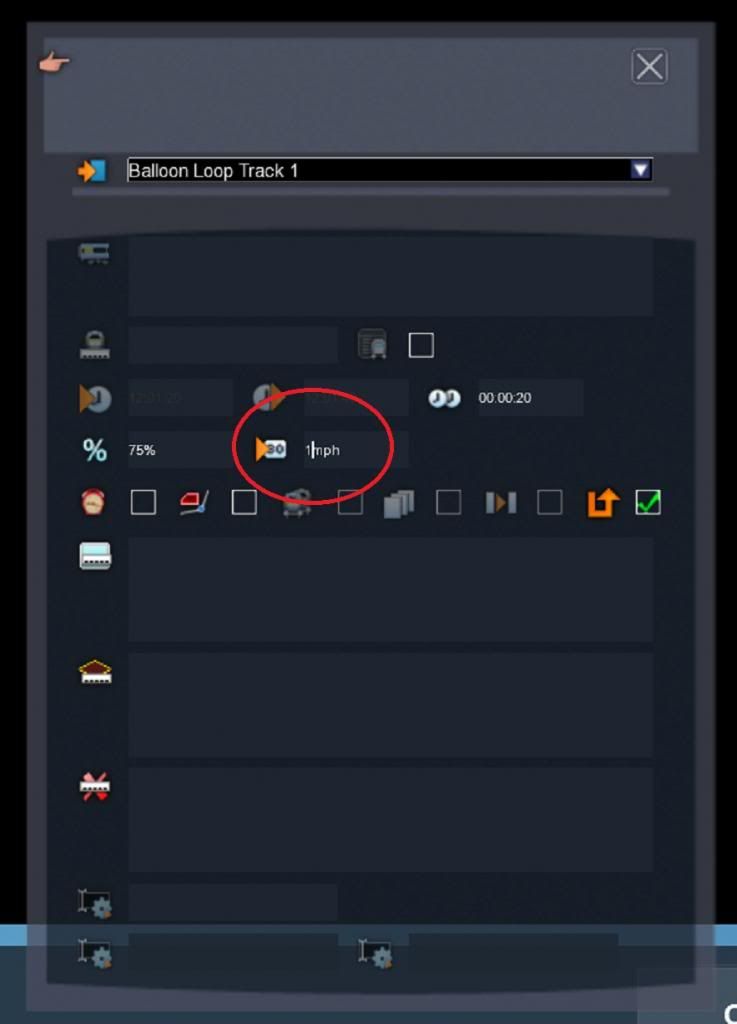
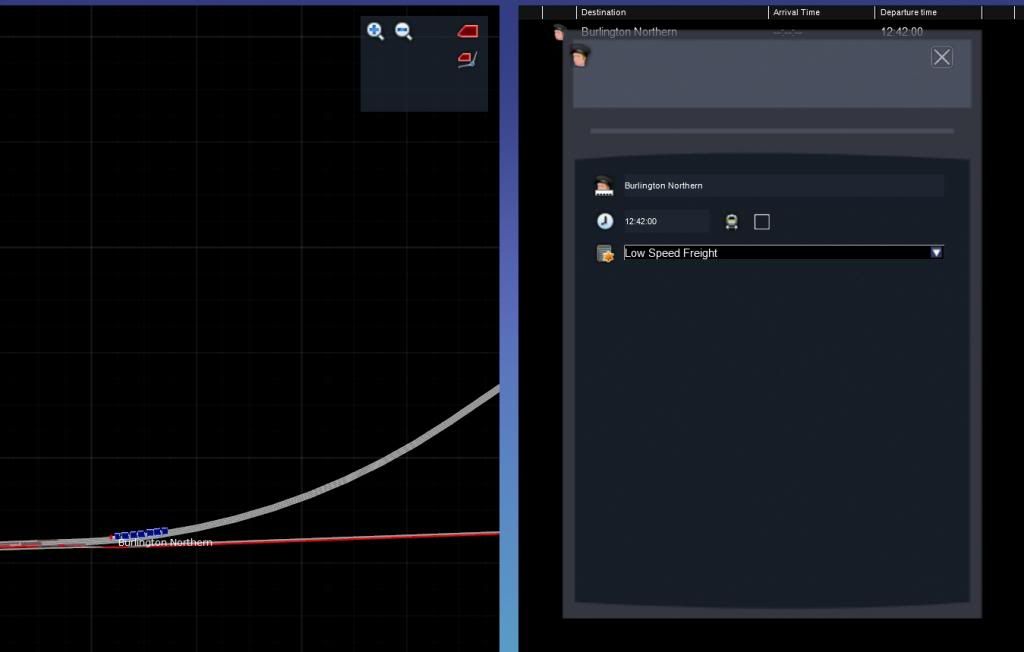
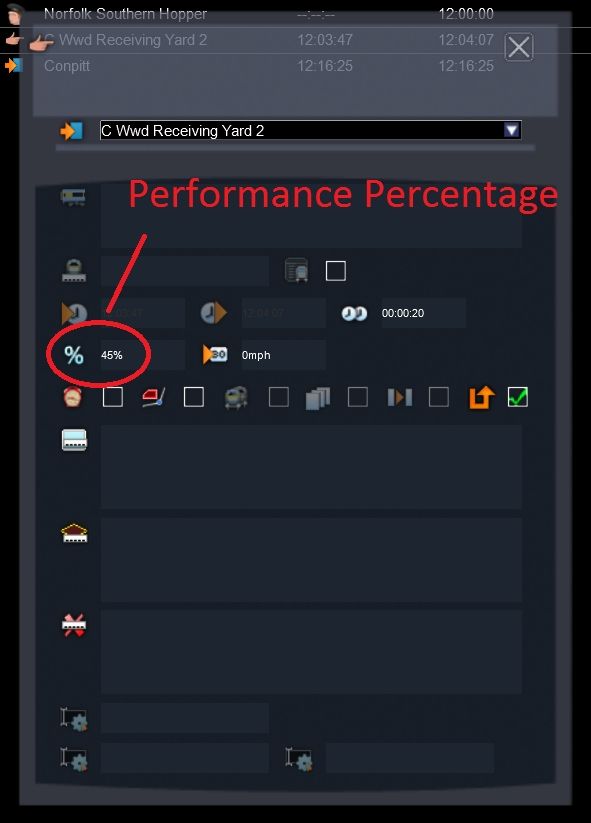
Then you'll see a box like the one in Pic12 below. Type the train a name in the first line. Below that you can select the time this train will "start" it's given instructions. If you are controlling the train, just leave it at the time the scenario is starting. The check box next to the time is to make this train the Player(P) train. Make sure to check this if you want to be driving this train. In the drop down list is the priority of the train. In this scenario, we'll just be choosing Standard, though this selection can have an impact on scenarios with lots of traffic. When done, X out of the box.
Pic12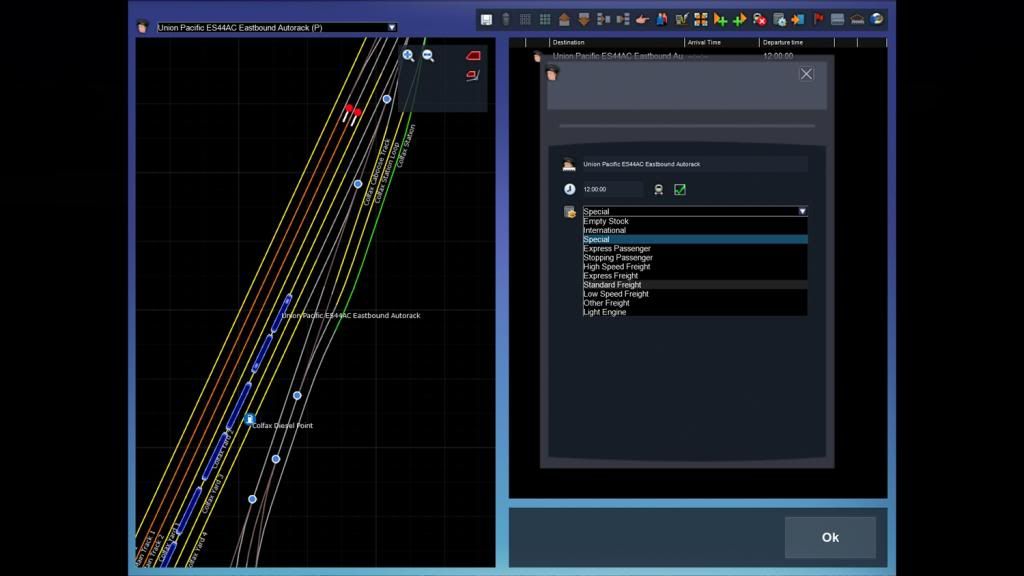
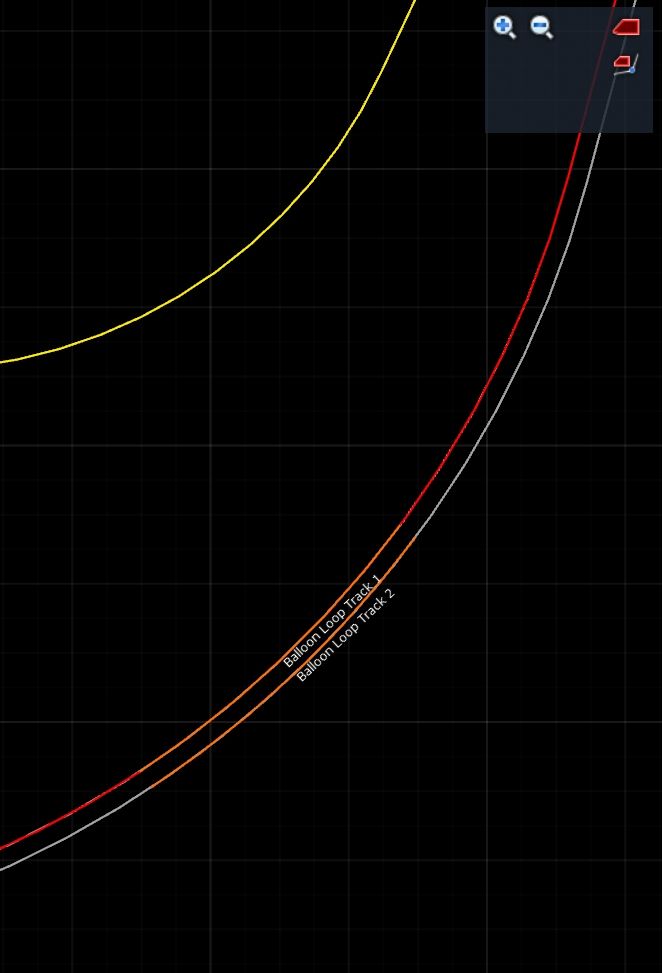
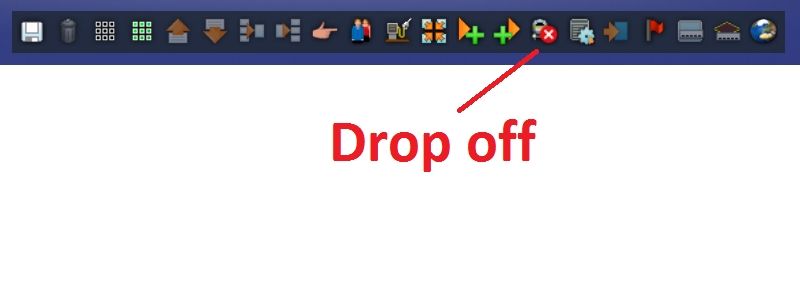
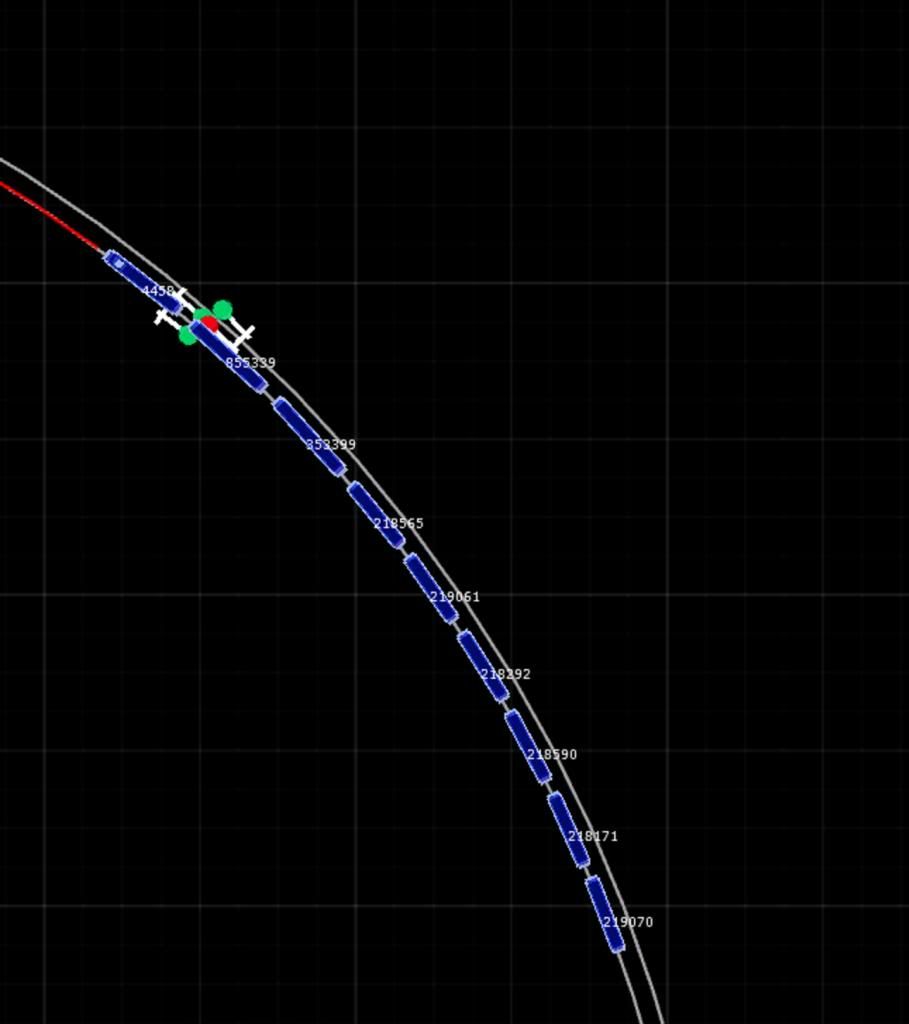
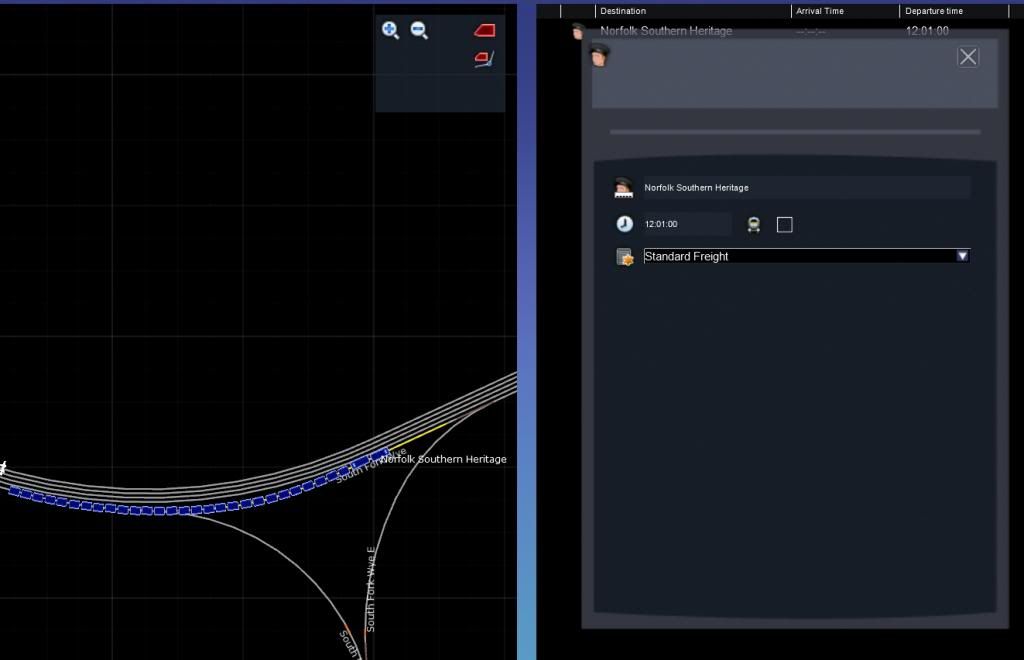
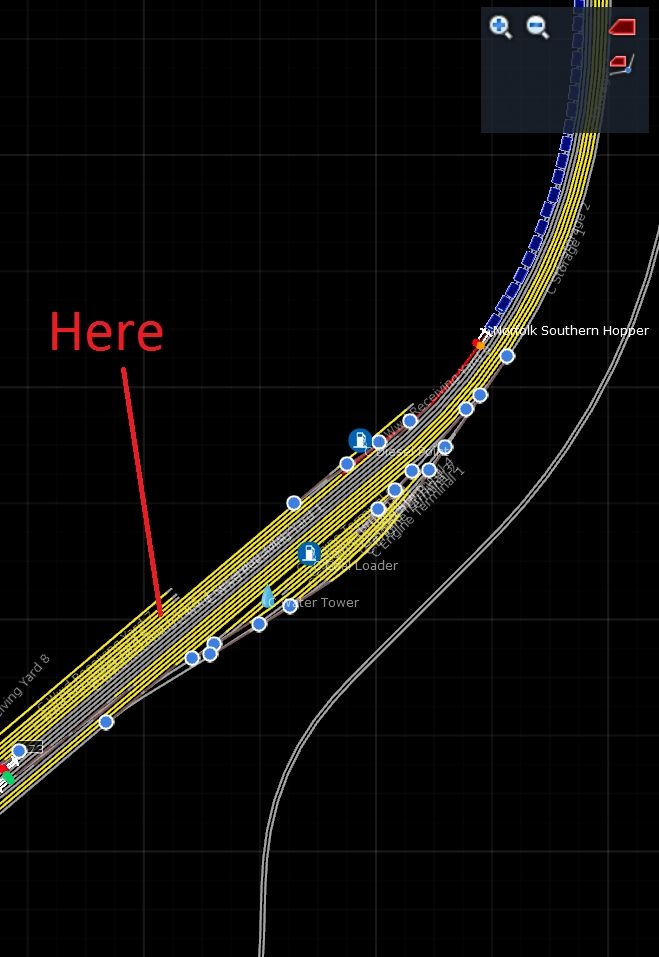
Now is a good time to save what is done. Click the "Save" icon on the upper tool bar. After that, click "Final Destination". A new box will appear like in Pic13. The final destination is simple. All you'll be doing is choosing a final destination, nothing else. You can uncheck the "Allow Reversing" box, but you should just leave it be. You can either manually select the final destination from the drop down list, or you can click the icon on the left side of the list box and then click the text of the final destination you wish to select on the 2D map. I chose Long Ravine Bridge Track 1, which is a short distance from my starting point. Again, when finished, X out of the box.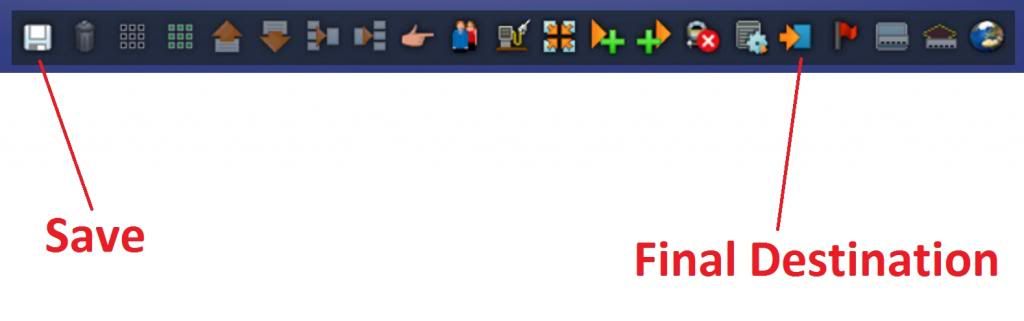
Pic13
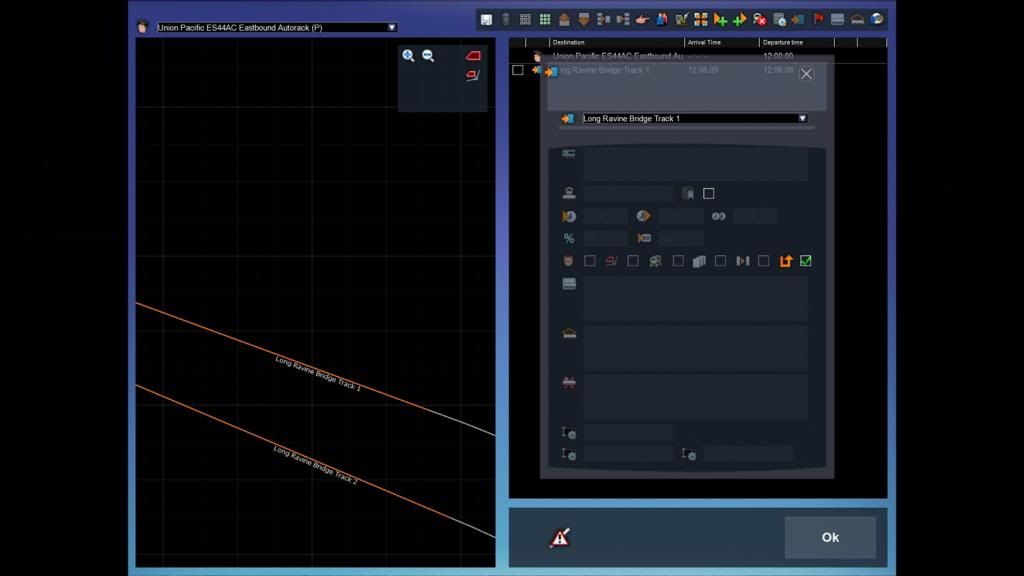
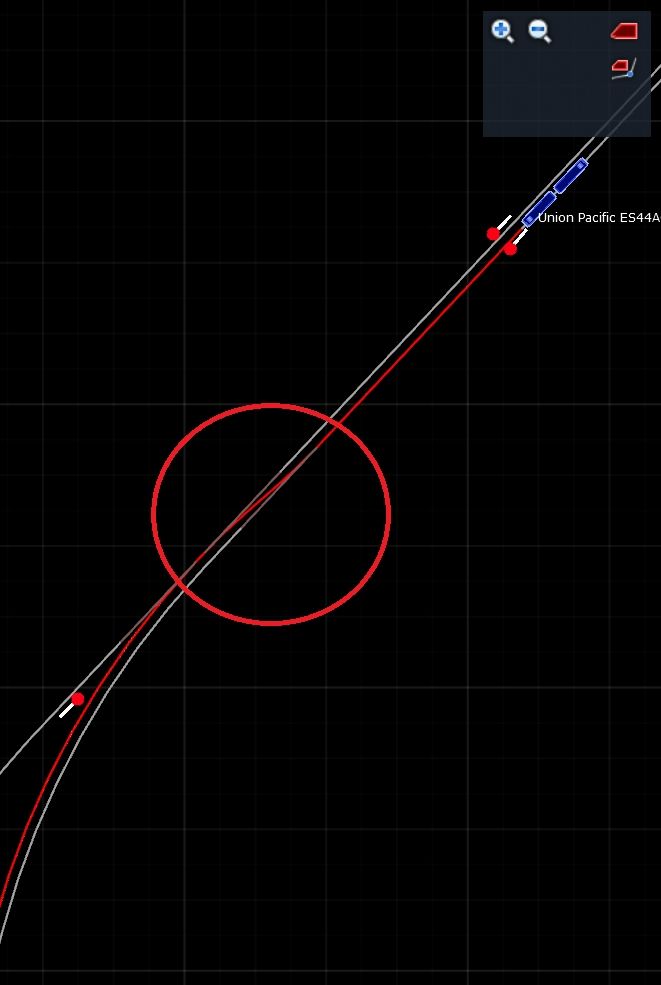
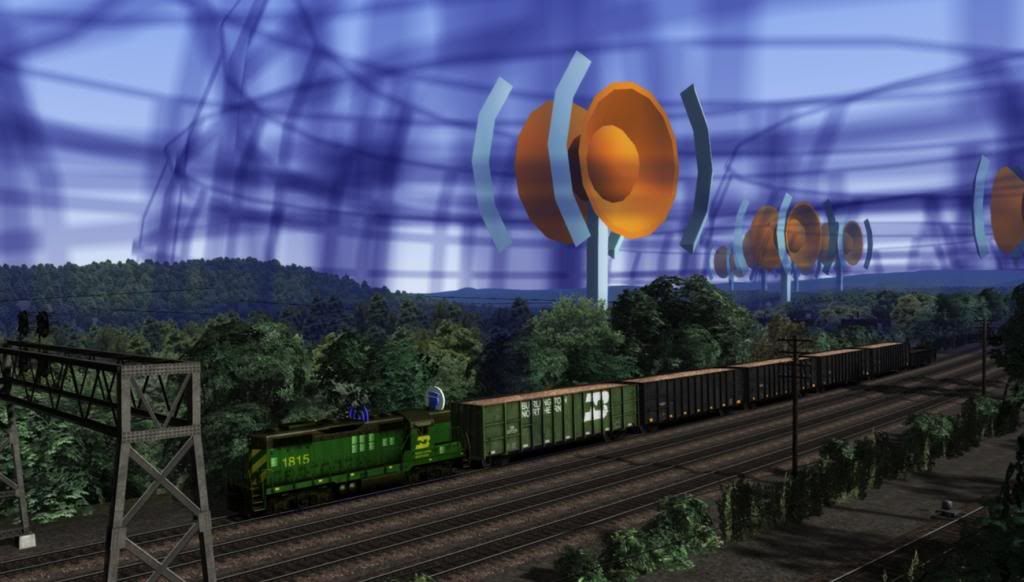
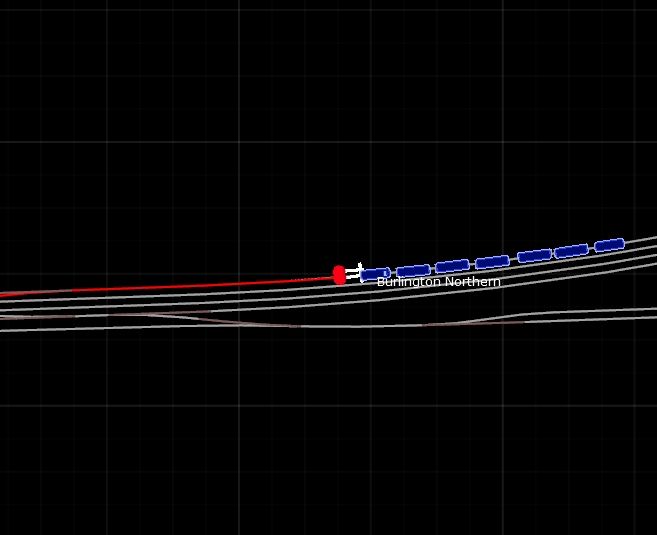
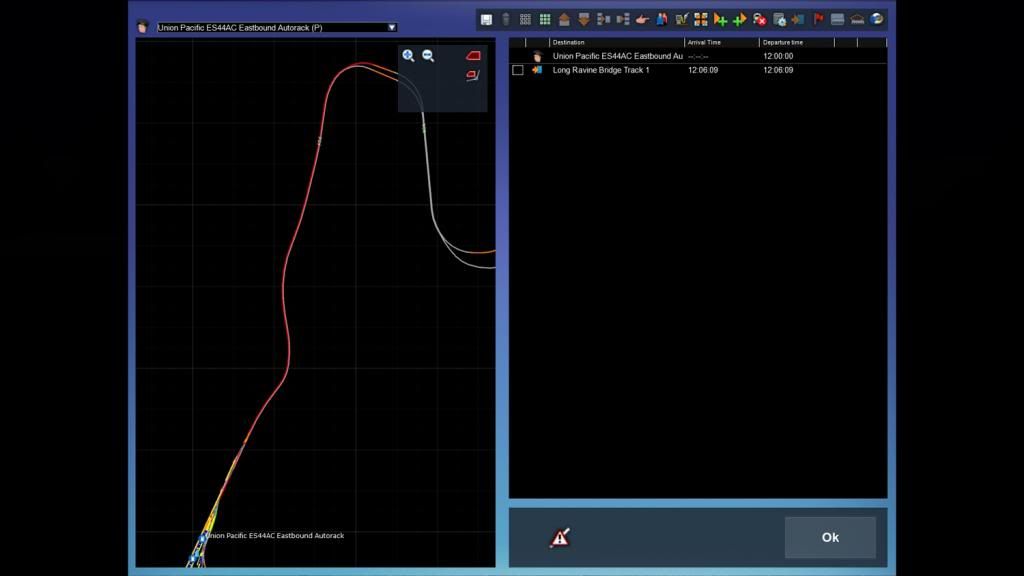
After selecting the destination, the game will calculate the route the train will take to the chosen destination. It will highlight this route in red on the 2D map. You'll also notice, the instruction was added to the list in the box on the right. It also gives me the estimated arrival time of 12:06. (Pic14).
Pic14
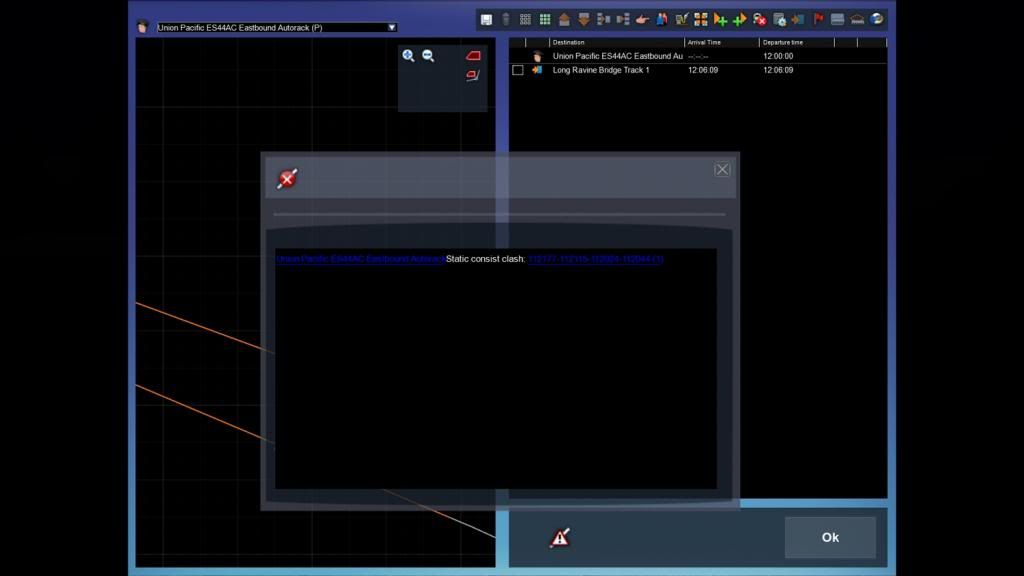
You may have noticed the error icon that has appeared to the left of the OK button. When you give a train an instruction, the game will calculate if this can be completed without error. If the game detects some kind of error or conflict, it will log it. You can view the list of conflicts by clicking that error icon. The error I got was a "Static consist clash". This error is common and can be caused by anything. The good news is, it doesn't matter and won't have an impact in-game, so just ignore these. (Pic15).
Pic15
There we have it. I've added a train, given it a driver and made it playable. I've also given this train a final destination so I'll have somewhere to go when I load the scenario. Now we can test what we have so far. To load the scenario, click the big play button on the bottom right of the screen, circled in Pic16. Keep in mind, you can also now find the scenario you just created listed with the others for that route from the game's main menu.
Pic16
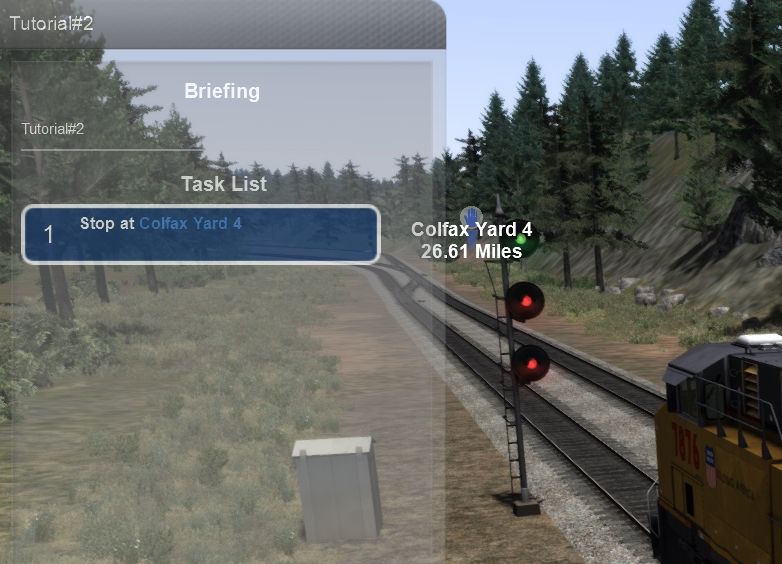
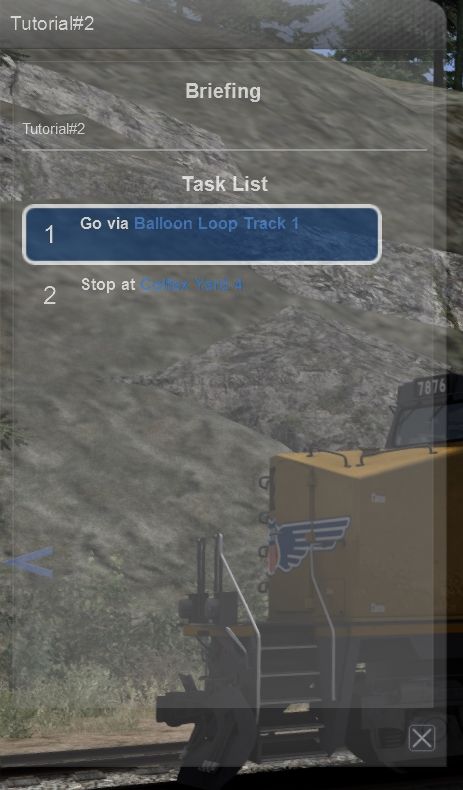
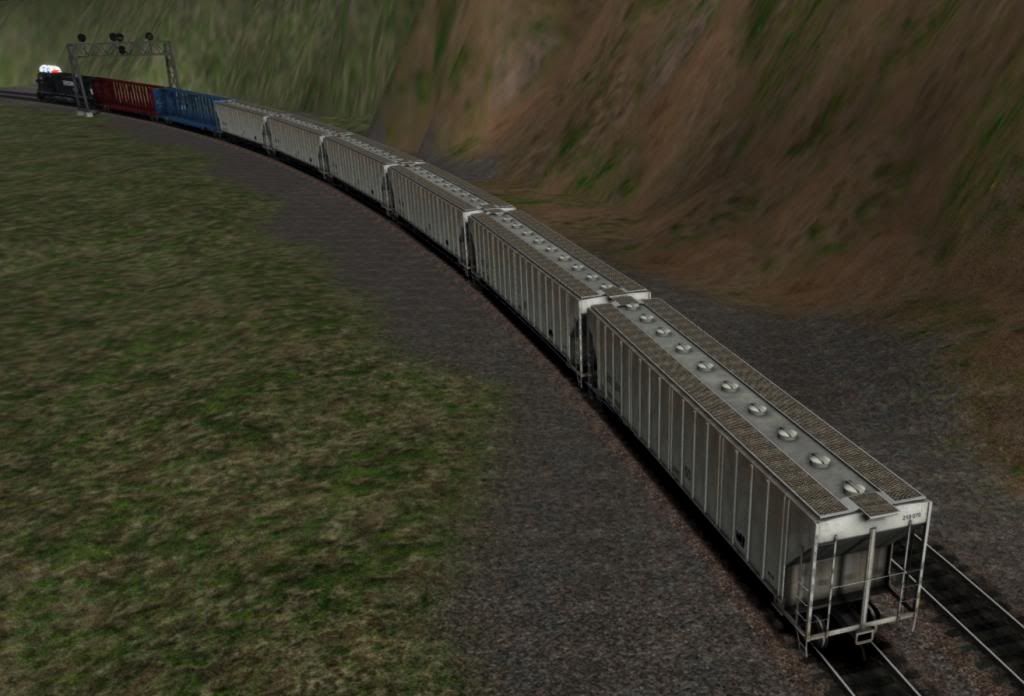
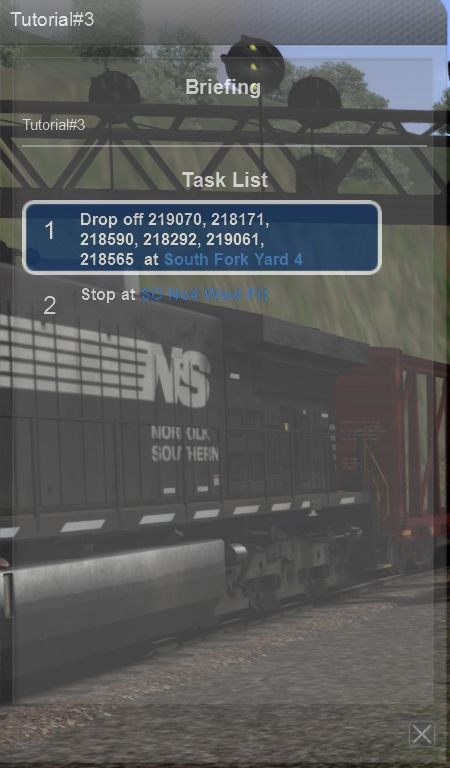
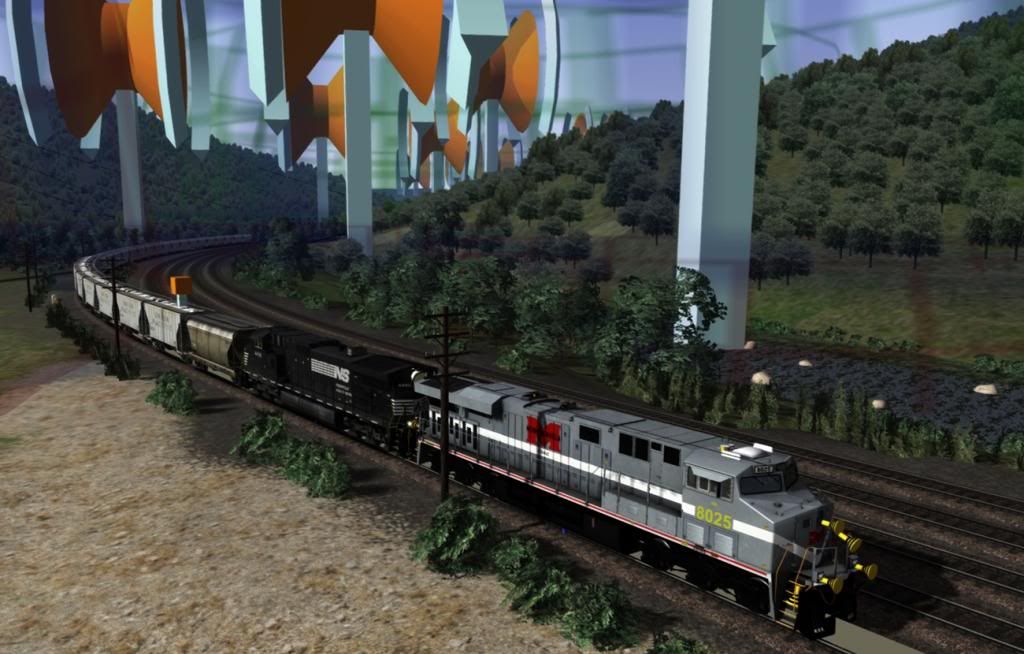
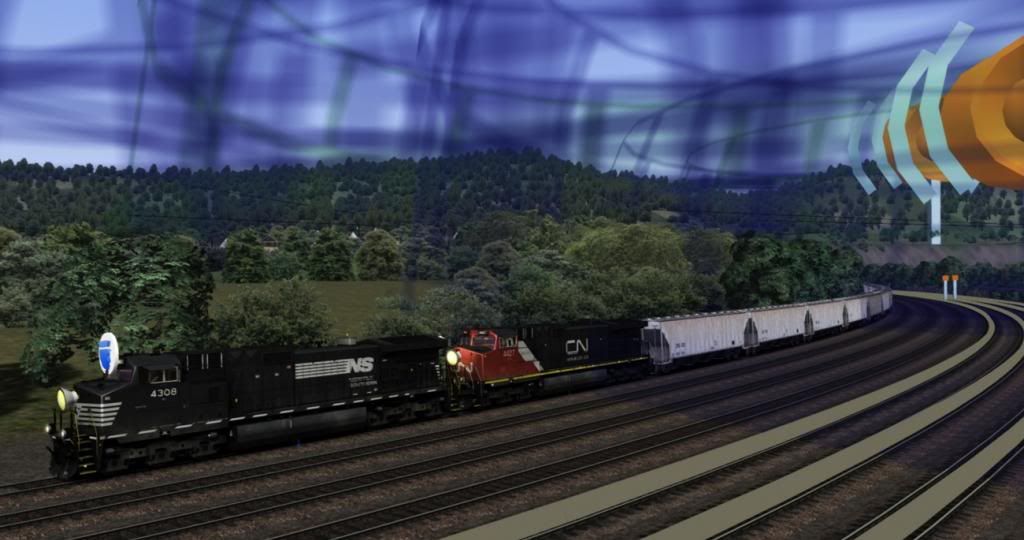
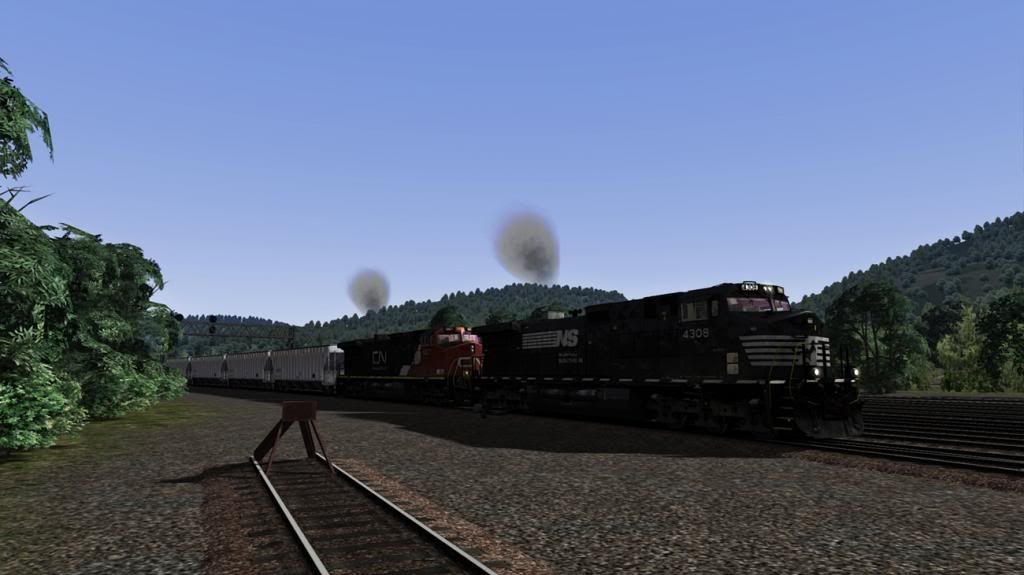
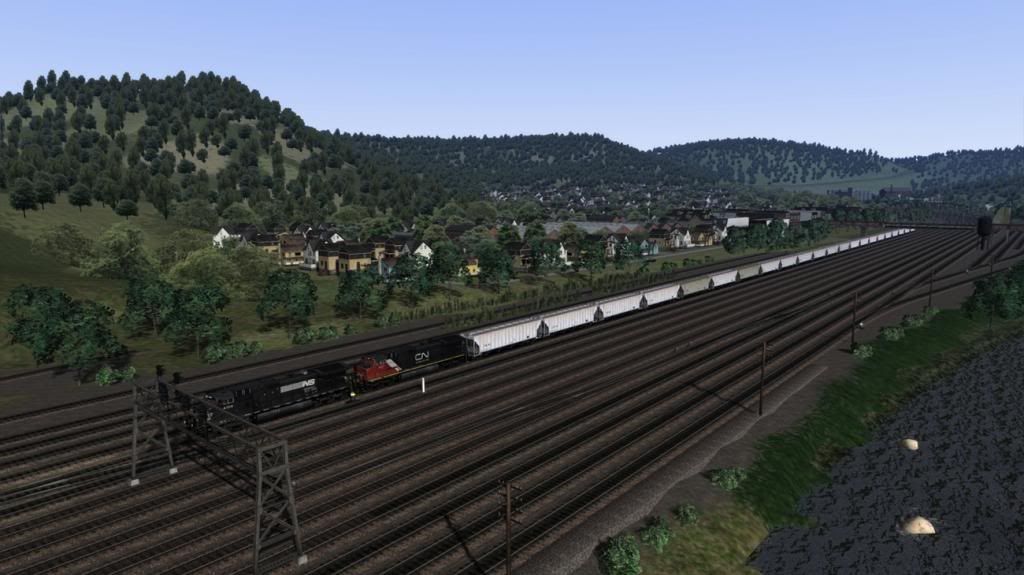
In Pic17 below, my game has loaded my scenario and I'm in charge of the train like normal. However, if you open the Briefing, you'll notice you don't have any waypoints or information in the Task List. But my final destination has worked, as well as the name of the scenario and the briefing text. From here I can drive the train to the final destination and the scenario will complete.
Pic17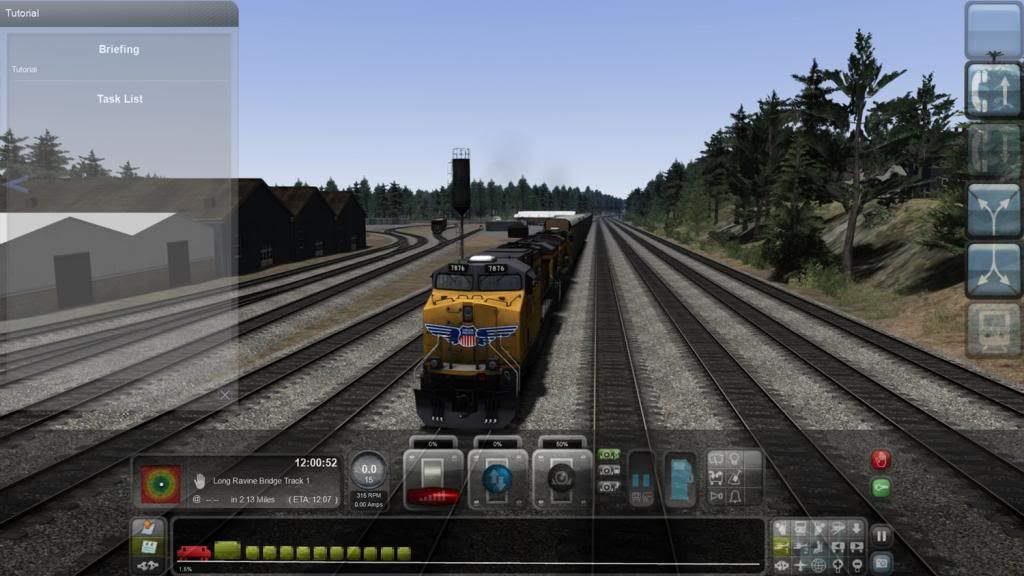
===
End
===
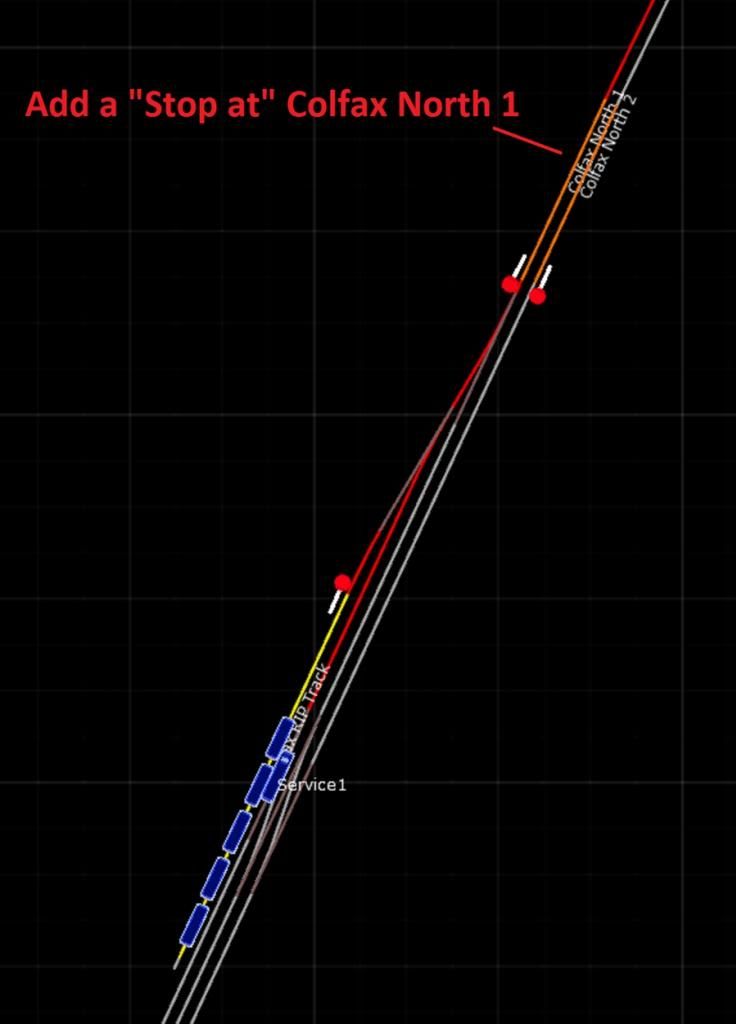
This is it for the first tutorial. Next I'll talk about how to make additions to the Task List, like waypoints and stop at instructions. Also how to manually change the path the game gives you to your final destination in the editor.
Here's some Tips
-Almost every clickable object in the editor has a tool tip if you hover over it with your mouse
-If a route tells you you can't edit or create a scenario because it is locked, choose to edit the route itself and click the unlock button next to the Drive button. Then save.
-If you double click a locomotive or piece of rolling stock, you can change it's direction by clicking the orange double sided arrow above the unit.
-To enter a 2D map view without entering the Timetable View in the editor, click the icon of the map on the navigation tool box in the top center of the screen.